Fall Pumpkin Painted Rocks
Turn round stones into pumpkins with an orange base coat, curved rib lines and a brown stem, then try cream and sage green versions for a fall display.

Tutorial at a glance
Materials
- Acrylic craft paint: white, orange, burnt orange or rust, brown, leaf green
- Flat brush, about 1/2 in (12 mm)
- Round brush, size 4
- Liner brush or brown acrylic paint pen
- Pencil
- Jar of water, cloth and palette
- Clear sealer (optional)
A round, slightly squat stone is already most of the way to being a pumpkin. All it needs is an orange coat, a few curved lines to suggest the ribs, and a stubby brown stem. The whole design uses four colors and no fine detail, which makes it a good first project for fall.
Picking stones that look like pumpkins
Look for stones that are round or a little wider than they are tall, with a domed top. A size of 2 to 3 in (5 to 8 cm) across is comfortable to hold and paint. Slightly lumpy stones work well here, since real pumpkins are rarely perfect, but the surface itself should be smooth so the rib lines do not skip over pits.
Craft stores and garden centers sell bags of smooth stones, which is the simplest way to get a matching set. Rules about collecting stones differ by place, and it is not allowed in many parks and protected areas, so check local rules and get permission before picking any up. There is more on shape and surface in the guide to choosing rocks for painting.
Supplies
- Round stones, washed and completely dry
- Acrylic craft paint: white, orange, a darker burnt orange or rust, brown and leaf green
- A flat brush about 1/2 in (12 mm) wide for base coats
- A round brush, size 4, and a liner brush or a brown acrylic paint pen
- A pencil, a jar of water, a cloth and a palette or old plate
If you do not have a darker orange, mix a small amount of brown into your orange on the palette. Add the brown a little at a time; it takes over quickly.
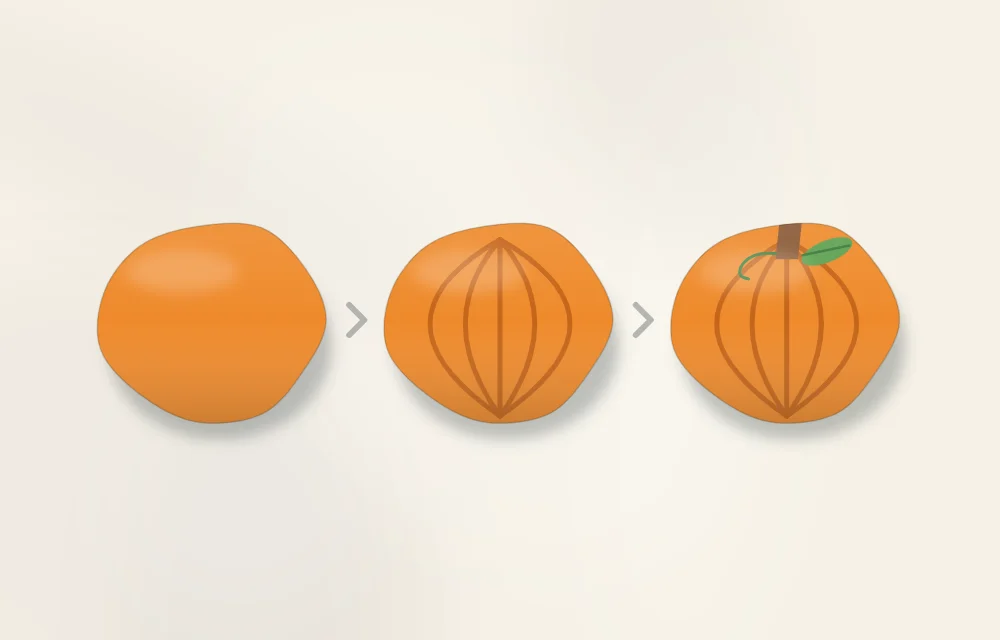
How to paint a pumpkin rock
- Prime with white. Orange is a fairly see-through color, and on a gray stone it dries dull. Brush one thin coat of white over the top and sides with the flat brush and let it dry. On a pale stone you can skip this step.
- Paint the orange base coat. Cover the white with orange, working from the top of the dome down toward the base in long strokes. Let it dry and add a second thin coat. Two thin coats give a smoother, more even color than one heavy coat.
- Mark the stem spot. Decide where the top of the pumpkin is, usually just above the center of the stone, and make a small pencil dot there. Every rib line will start from this point, so placing it now keeps the lines evenly spread.
- Add the curved rib lines. Load the round brush with the darker orange and wipe most of it off on the palette edge. Start at the pencil dot and pull a line straight down the middle to the base. Then add two or three lines on each side, each one bowing outward like a pair of parentheses, with the curve getting stronger toward the edges of the stone. Turn the stone as you go so your hand always pulls the brush toward you.
- Soften one side of each rib. While a rib line is still slightly damp, rinse and blot the brush and stroke lightly along one side of the line to blur it into the base color. This gives each section a rounded look. If the line has already dried, leave it crisp; that style looks good too.
- Paint the stem. With brown on the round brush, paint a short, thick stem over the pencil dot: a small rectangle that is a little wider at the bottom and tilts to one side. Let the bottom of the stem fan out slightly over the tops of the rib lines to hide where they meet.
- Add a leaf and a tendril. Beside the stem, paint one small green leaf with two strokes that meet at a point. With the liner brush or paint pen, add a short curly tendril on the other side. Keep both small so the orange stays the focus.
- Finish with a highlight. Mix a little white into the orange and paint a short curved stroke on the upper left of two or three sections. This lighter patch makes the pumpkin look round.
Tip
If the rib lines come out too dark or too wide, wait for them to dry, then brush a thin layer of the base orange over the whole stone. The lines will still show through, only softer.
Color variations for a fall set
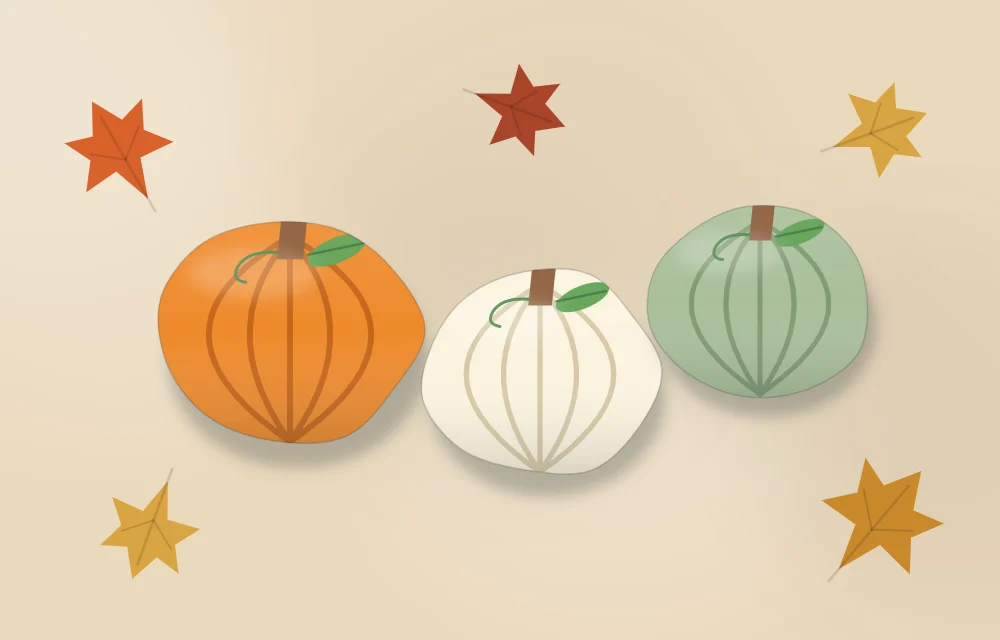
A group of pumpkins in different colors looks more interesting than a row of identical orange ones. The steps stay the same; only the base and rib colors change.
| Pumpkin color | Base coat | Rib lines | Stem |
|---|---|---|---|
| Classic orange | Orange over white | Burnt orange or rust | Brown |
| Cream | White with a touch of yellow and brown | Light tan | Soft brown or olive green |
| Sage green | Green mixed with white and a little gray | Darker sage | Brown |
| Deep red-orange | Orange with a little red | Brown-red | Dark brown |
For cream and sage pumpkins, keep the rib lines only a shade or two darker than the base. Pale pumpkins look best with gentle contrast. For help mixing a set of colors that sit well together, see the guide to color planning for rock painting.
Optional faces and patterns
Once the pumpkin is dry, it can stay plain or become something else:
- A simple carved face. Paint two triangles for eyes and a wide zigzag mouth in black, using original shapes of your own. Sketch them in pencil first so they sit level.
- Polka dots. Use the handle end of a brush to stamp white dots over a finished pumpkin. The basics are covered in the guide to dot painting on rocks.
- Outlined ribs. Trace each rib line and the outer edge with a fine dark brown line for a bolder, storybook look.
Drying, sealing and display
Let the finished pumpkins dry all the way through before handling them much. Raised areas, such as a thick stem, take longer than the flat base coat. If you want to seal them, use a clear sealer suited to your paints and follow the manufacturer’s instructions on the label for drying times, number of coats and ventilation. An adult should handle the sealer, especially if it is a spray. The full process is in how to dry and seal painted rocks.
Indoors, pumpkin stones look good in a shallow bowl, lined up along a windowsill or scattered down the middle of a table with a few dried leaves. If you set them on a porch or step, be aware that painted rocks kept outdoors can fade, chip or wear, and may need touching up. They are decorations, not toys, so keep them out of reach of small children.
When the season changes, the same round stones and the same base-coat method carry straight over to winter snowman rocks.
Frequently asked questions
What shape of rock is best for a pumpkin?
Round stones, or ones a little wider than they are tall with a domed top, look most like pumpkins. A size of 2 to 3 inches across is easy to hold and paint. A slightly lumpy outline is fine as long as the surface is smooth.
Why does my orange paint look dull on the rock?
Orange is often partly see-through, so a gray or dark stone shows through it. Paint a thin coat of white first, let it dry, then add two thin coats of orange. The white underneath keeps the color bright.
Can I put pumpkin rocks outside on a porch?
You can, but painted rocks kept outdoors can fade, chip or wear and may need touching up. If you seal them, choose a clear sealer labeled for outdoor use and follow the instructions on the label. Results depend on the product, the stone and the conditions.