15 Easy Rock Painting Ideas for Beginners
Fifteen simple rock painting designs built from dots, stripes and big shapes, with notes on which stone shape suits each one.

A good first rock design has three things going for it: few colors, big shapes, and no step where a shaky line ruins the whole stone. The fifteen ideas below all fit that description. Each one can be painted with a small set of acrylic craft paints, one round brush and something to make dots with.
They run roughly from simplest to slightly more involved.
What you need before you pick a design
Every idea here starts the same way: a clean, dry, smooth stone and a solid base coat. If you have not prepared stones before, the guide on how to clean and prepare rocks covers washing and priming. A basic kit is enough:
- Smooth stones about 2 to 3 in (5 to 8 cm) across. Craft or landscaping stones sold in bags are an easy source; if you would rather collect your own, rules differ by place, so check local rules and get permission first.
- Acrylic craft paint in red, yellow, blue, green, white and black.
- A round brush around size 4 or 6 for filling shapes, and a small detail brush for lines.
- A dotting tool, or a stand-in such as the handle end of a brush, a cotton swab or a toothpick.
- A jar of water, a cloth or paper towel, and a pencil for light sketching.
Tip
Let the base coat dry fully before adding the design. If the surface still feels cool or tacky, the next color will drag it up and turn muddy. Drying time varies with the paint and the room, so follow the label on your paint.
Five ideas that need almost no drawing
1. Polka dots
Paint the stone one color, then dip the handle end of a brush into a second color and press it straight down. Reload the handle for every dot so they stay the same size. Space them in loose rows or scatter them at random.
2. Rainbow stripes
Paint curved bands side by side across the stone, working from red through to purple, and rinse the brush well between colors. Slightly wobbly edges look fine on a rainbow.
3. Bold diagonal stripes
Paint a pale base, then add slanted bands in one or two stronger colors. Pull the brush in one direction rather than scrubbing back and forth, and turn the stone so each stroke moves toward you.
4. A single heart
On a white or pastel base, paint two fat dots next to each other and pull each one down to a shared point. That gives a rounder, more even heart than trying to draw the outline first.
5. Color-dipped stones
Paint only half the stone in one bright color, leaving the bare stone showing on the other half. A strip of masking tape gives a sharp edge. Press it down firmly and peel it away slowly once the paint is touch-dry.

Five ideas from the garden
6. A smiling sun
Paint a yellow circle in the middle of a sky-blue stone. Add short orange or yellow rays around it with the tip of the round brush, pressing down and lifting as you pull outward so each ray tapers.
7. A leaf
Fill a pointed oval with green, let it dry, then add a center vein and a few side veins in a lighter green. The longer tutorial on painting leaves on rocks shows ferns and vines once this one feels comfortable.
8. A daisy
Start with a yellow dot in the center of a teal stone. Add four white petals like the points of a compass, then fit one more petal into each gap. Placing the first four evenly keeps the flower from leaning to one side.
9. A ladybug
A round stone, a red base coat, a black head and a handful of black dots. It is one of the most forgiving animal designs, and the ladybug rock tutorial walks through each layer.
10. A bumblebee
Use an oval stone, paint it yellow, and add three or four black stripes across it. Two white teardrop wings and a pair of dot eyes finish it.
Five ideas with a little more detail
11. A watermelon slice
A stone shaped like a rounded triangle is ideal. Paint most of it pinkish red, add a thin white band and then a green band along the wide edge, and finish with small black teardrop seeds.
12. A strawberry
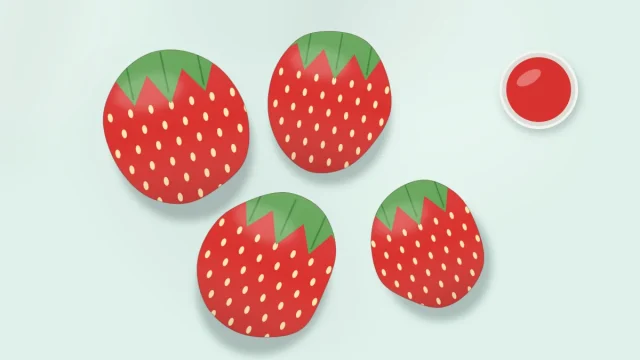
Choose a stone that narrows at one end. Paint it red, add a green leafy cap at the wide end, and dot on pale yellow seeds with a toothpick.
13. A night sky
Paint the stone dark navy. When it is dry, add a white crescent moon and dot on stars in two sizes. A few tiny dots made with a toothpick between the larger ones give the sky depth.
14. A simple fish
Turn an oval stone on its side, paint it one bright color, and add a tail, a fin, rows of curved scales and one round eye.
15. A ring of dots
Place one large dot in the center of a dark stone, then surround it with a ring of smaller dots, and another ring outside that. This is the first step toward the patterns in the guide to dot painting on rocks.

Which idea suits which stone
The shape of the stone does a lot of the work. Matching the design to the stone means less correcting later.
| Stone shape | Designs that fit | Why it works |
|---|---|---|
| Round and domed | Ladybug, sun, ring of dots, polka dots | The design can sit in the center with even space all around. |
| Oval | Bumblebee, fish, leaf, rainbow stripes | The long side gives room for stripes, scales or a body. |
| Narrow at one end | Strawberry, watermelon slice, heart | The taper already suggests the outline. |
| Wide and flat | Night sky, daisy, diagonal stripes | A flat face is easier for backgrounds and fine dots. |
Habits that make easy designs look neat
- Use two thin coats instead of one thick one. Thick paint dries slowly, shows brush ridges and can crack. A second thin coat covers the patches the first one left.
- Paint light colors over white. Yellow and pink look dull straight onto dark stone. A white layer underneath keeps them bright.
- Work from large shapes to small ones. Background first, main shapes second, dots and lines last.
- Fix mistakes after they dry. A slip in wet paint can be lifted with a damp cotton swab. Once it has dried, paint over it with the background color and try again.
Finishing and displaying your stones
When the paint has dried, a clear sealer helps protect the surface from scuffs. Brush-on and spray types are both common. Follow the manufacturer’s instructions for the number of coats, drying time and ventilation, and have an adult handle spray products. The guide on how to dry and seal painted rocks explains the process step by step.
Painted rocks kept outdoors can fade, chip or wear over time and may need touching up, so many beginners keep their first stones indoors on a shelf or in a bowl. Painted stones are decorations rather than toys. Keep them away from small children, since they are a choking and throwing hazard, and do not place them in aquariums or use them with food.
Watch out
If you plan to leave a painted rock in a public place for someone to find, check the local rules and get permission first. Many parks and protected areas do not allow it.
Frequently asked questions
What is the easiest thing to paint on a rock?
Polka dots on a solid base coat are about as simple as it gets, because there is nothing to draw. Stripes, a single heart and a ladybug are good next steps since they use big shapes and only two or three colors.
Do I need to prime rocks before painting easy designs?
A base coat is not strictly required, but it helps a lot. A layer of white or a solid color gives the stone an even surface and makes the colors on top look brighter, especially yellow, pink and other light shades.
Can I use paint pens instead of brushes for these ideas?
Yes, acrylic paint pens work well for dots, outlines and small details such as seeds and stars. Many beginners brush on the base coat and larger shapes, then switch to pens for the fine parts. Check the label for drying time and for which sealers are compatible with the pens.