How to Paint a Bumblebee Rock
Turn an oval stone into a bumblebee with a yellow base coat, black stripes, white wings and a simple face. Includes stripe tips and fixes.

Tutorial at a glance
Materials
- Acrylic craft paint: yellow, black, white
- Flat brush, about 1/2 in (12 mm) wide
- Round brush, size 4 or 6
- Detail brush or black acrylic paint pen
- Dotting tool, or a brush handle and a toothpick
- Pencil, jar of water and paper towel
- Masking tape (optional, for straight stripes)
- Clear sealer, brush-on or spray (optional)
Yellow first, black second, white last. That order is the whole secret of a bumblebee rock, and it exists for a practical reason: yellow cannot cover black, but black covers yellow in a single stroke. Paint the layers the other way around and the stripes turn greenish and thin.
This project uses one oval stone and three colors of paint. The painting itself is quick; most of the time goes to letting each layer dry.
What you need
- One smooth oval stone, about 2 to 3 in (5 to 8 cm) long, clean and dry
- Acrylic craft paint in yellow, black and white
- A flat brush about 1/2 in (12 mm) wide for the base
- A round brush, size 4 or 6, for the stripes and wings
- A small detail brush or a black acrylic paint pen for the smile
- A dotting tool, or a brush handle and a toothpick, for the eyes
- A pencil, water jar and paper towel
- Clear sealer, brush-on or spray (optional)
An egg-shaped stone that is a little fatter at one end makes a convincing bee: the wide end becomes the face and the narrow end the tail. If you are buying stones, bagged craft or landscaping pebbles usually include plenty of ovals. Wash and dry the stone first; the steps are in how to clean and prepare rocks for painting.
Step-by-step instructions
- Brush on a white undercoat. Yellow is one of the most transparent craft colors. Over bare gray stone it dries to a dull mustard, so start with one thin coat of white over the top and sides. Let it dry completely.
- Paint the yellow base coat. Cover the white with yellow, using the flat brush and long strokes that follow the length of the stone. Let it dry and add a second coat. If streaks still show, a third thin coat is better than pressing harder with the second.
- Plan the stripes. With a pencil, lightly mark where the stripes will cross the stone. Leave the wide front third plain yellow for the face, then mark three stripes across the rest, with yellow gaps about the same width as the stripes. The last stripe can cover the tail tip.
- Paint the black stripes. Load the round brush with black and paint each stripe across the short width of the stone, carrying it down over the sides so the bee looks finished from every angle. Paint both edges of a stripe first, then fill between them. Let the stripes follow the curve of the stone; a slight bow makes the body look rounder.
- Let the black dry fully. This pause matters. White laid over damp black turns gray, and the wings are the brightest part of the design.
- Add the white wings. Paint two teardrop shapes on the back, starting just behind the face. Set the points close together near the center and let the rounded ends fan out toward the sides, crossing the first stripe or two. Press the round brush down for the wide end and lift as you pull toward the point. A second coat keeps the stripes from showing through.
- Dot the eyes. On the yellow face, press two black dots with the handle end of a brush. When they are dry, add a tiny white dot near the top of each with a toothpick to give them a spark.
- Draw the smile. Using a detail brush or paint pen, add a short curved line below and between the eyes. Keep it small; a wide smile can crowd the first stripe.
- Dry and seal. Leave the stone until every layer is dry, then apply clear sealer if you want one, following the manufacturer’s instructions.

Tip
For stripes with straight edges, wrap strips of masking tape around the dry yellow stone and paint between them. Press the tape edges down well, brush away from the tape rather than toward it, and peel it off slowly once the black is touch-dry.
Getting clean stripes without tape
Freehand stripes are quicker and suit the rounded look of a bee. A few habits help:
- Hold the stone in one hand and rest the heel of your painting hand on the table. Turn the stone as you paint so the brush always moves in a comfortable direction.
- Use paint the consistency of heavy cream. If it is stiff, add a drop of water; if it runs, blot the brush.
- Paint the middle stripe first. It is easier to space two more stripes on either side of it than to work from one end and run out of room.
- If an edge wanders, wait for it to dry and straighten it with yellow on a small brush.
More ways to steady a brush or pen are covered in how to outline painted rocks.
Troubleshooting
| Problem | Cause | Fix |
|---|---|---|
| Yellow looks greenish or dull | No white undercoat, or dirty rinse water | Change the water, let the stone dry and add another coat of yellow. |
| Stripes are uneven widths | Painted from one end without planning | Widen the narrow stripes to match, or correct with yellow once dry. |
| Wings look gray | Black was still damp, or only one coat of white | Let it dry and add a second coat of white. |
| Smile is too thick | Too much paint on the brush | Cover it with yellow when dry and redraw with a paint pen. |
Variations to try
Once the basic bee works, small changes give each stone its own look:
- Add two short antennae with a black paint pen, each ending in a dot.
- Outline the wings with a thin gray line, or add two curved lines inside each wing for veins.
- Paint closed eyes as two small downward curves for a sleepy bee.
- Mix a little orange into the yellow for a warmer, honey-colored body.
- Paint a hive set: one large bee and several small ones on stones about 1 in (2.5 cm) long.
A bee looks even better next to something to visit. Paint a simple blossom on a second stone using the method in how to paint flowers on rocks, and arrange the bees around it.

Sealing and where to keep it
Sealer helps protect the paint from scuffs and handling. Choose one that is suitable for acrylic paint, and check that it is compatible with paint pens if you used one for the smile. The label will tell you how many coats to use, how long to wait between them and what ventilation is needed. Spray products should be handled by an adult.
Bee stones suit plant pots, window ledges and the edge of a flower bed. Any painted rock kept outside can fade, chip or wear, so expect to touch it up now and then. Painted rocks are decorative only. They are not toys for small children, as they can be a choking and throwing hazard, and they should not go in aquariums.
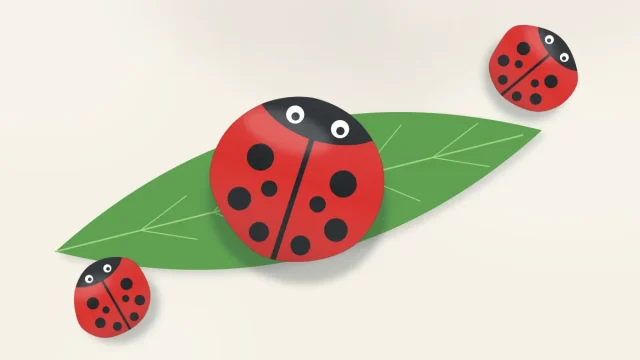
For a companion piece, the ladybug rock tutorial uses the same three colors with red in place of yellow, and the fish rock is a good next step on an oval stone.
Frequently asked questions
Why should I paint the yellow before the black stripes?
Yellow is a transparent color and cannot cover black, while black covers yellow easily in one stroke. Painting the whole stone yellow first and adding the stripes on top gives clean, bright bands.
How many stripes should a bumblebee rock have?
Three black stripes fit well on a stone 2 to 3 inches long, with the front third left yellow for the face. On a smaller stone two stripes are enough, and a longer stone can take four.
How do I stop the white wings from turning gray?
Wait until the black stripes are completely dry before painting over them. Use two coats of white, letting the first one dry before adding the second.