Geometric Rock Painting Designs: Triangles, Chevrons and Color Blocks
Use narrow masking tape over a white base coat to paint crisp color blocks, triangle mosaics and chevrons on smooth stones.

Tutorial at a glance
Materials
- Acrylic craft paint: white, plus three or four colors
- Low-tack masking tape or painter's tape, narrow or cut into strips
- Flat brush for the base coat
- Small flat or round brush for filling sections
- Small detail brush or white acrylic paint pen for touch-ups
- Scissors, cutting mat and craft knife (adult use)
- Tweezers
- Pencil and ruler
- Clear sealer, brush-on or spray (optional)
Straight lines on a curved stone sound difficult, and freehand they are. The answer is to stop painting the lines at all. Paint the stone white, cover the lines with narrow tape, fill the spaces with color and peel the tape away. The white underneath becomes a set of clean dividing lines.
That one technique produces color blocks, triangle mosaics and chevrons. The designs differ only in where the tape goes.
Supplies
- Smooth stones about 2 1/2 to 3 1/2 in (6 to 9 cm) across. The smoother and flatter the surface, the better tape seals against it.
- Acrylic craft paint in white plus three or four colors.
- Low-tack masking tape or painter’s tape. Narrow tape, about 1/8 to 1/4 in (3 to 6 mm), is ideal. Wider tape can be cut into strips.
- A flat brush for the base coat and a small flat or round brush for filling sections.
- Scissors, a cutting mat and a craft knife for slicing tape into strips, and tweezers for peeling.
- A pencil and a ruler.
Watch out
Cutting tape into narrow strips with a craft knife is a job for an adult. Stick the tape to a cutting mat, cut along a ruler with the blade moving away from your fingers, and cap the knife afterward. Children can use scissors or ready-made narrow tape instead.
Plan the colors before you tape
Geometric designs depend on contrast between neighbors. Choose three or four colors and decide on one rule: no two sections that share a side get the same color. A quick pencil sketch on paper, with a letter in each section, saves you from repainting later.
Palettes that work reliably are two related colors plus one contrasting accent, such as teal, sky blue and coral, or one color in three strengths from pale to dark. More ways to build a set are in color planning for rock painting.
How to paint color blocks with tape
- Paint the white base coat. Cover the top and sides of a clean, dry stone with white acrylic paint, using two or three thin coats. This white will become your dividing lines, so make it solid and even.
- Let the base dry thoroughly. This is the step that decides whether the tape lifts cleanly. Paint that is only dry to the touch can peel away with the tape. Follow the drying time on the paint label, and leave it overnight if you can.
- Take some stick off the tape. Press each strip onto clean fabric, such as a sleeve or a tea towel, and pull it off again before using it. Slightly less sticky tape holds well enough but is much kinder to the paint underneath.
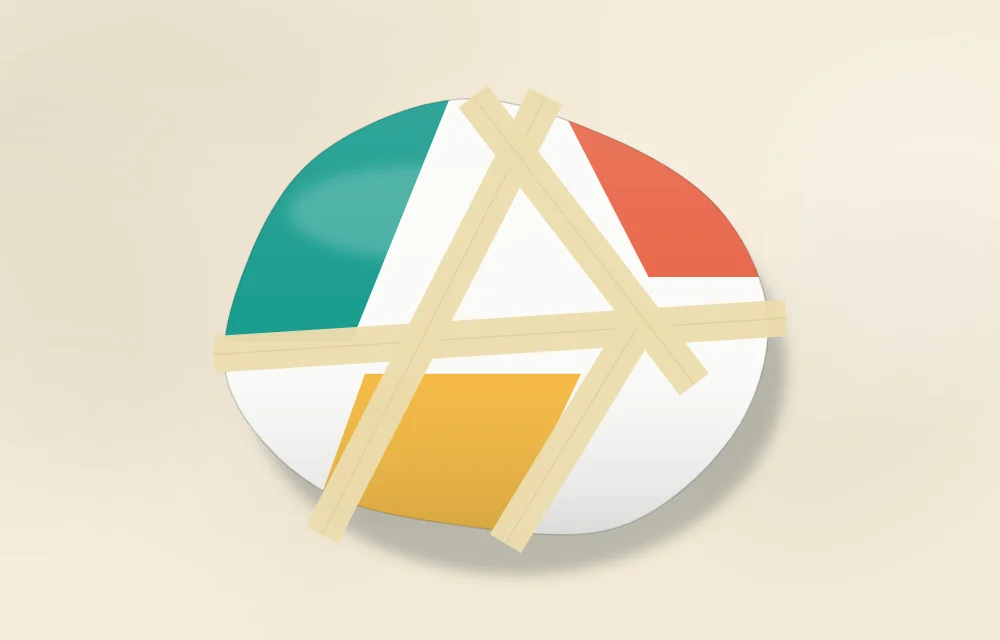
- Lay the first strips. Run one strip across the stone from edge to edge and down both sides. Add a second strip crossing it at an angle, then two or three more, until the surface is divided into five to eight sections of different sizes. Avoid making any section smaller than a fingernail, because tiny spaces are hard to fill.
- Seal the tape edges. Run a fingernail firmly along both edges of every strip, paying attention to the places where strips cross and where the stone curves. Then brush a thin coat of white along each tape edge and let it dry. Any paint that creeps under the tape will be white on white and invisible, and it blocks the colors from following.
- Fill the sections with color. Paint one section at a time with a small brush, stroking from the tape toward the middle of the section, not into the tape edge. Use thin coats. Two thin coats seep far less than one heavy one. Work through your plan so no neighbors match.
- Peel the tape. Remove the tape when the last coat is dry to the touch but not yet rock hard. Lift an end with tweezers and pull slowly, folding the tape back on itself at a low angle. Take the strips off in the reverse order you put them on.
- Touch up. Where color has crept onto a white line, correct it with white on a small detail brush or a white acrylic paint pen. Where a line looks ragged, a steady pass with the pen straightens it.
Triangle mosaic
The method is the same, with more tape. Lay three or four roughly parallel strips across the stone, then cross them with diagonal strips running in both directions, so that every space left over is a triangle. Fill the triangles with three or four colors, following the no-matching-neighbors rule. If any shape comes out with four sides, add one more short strip corner to corner to split it in two.
Leaving a few triangles white gives the pattern breathing room and makes the colors look brighter.
Bold chevrons
Chevrons are rows of V shapes, and they need a little measuring. Draw a faint pencil line down the middle of the stone lengthwise. Lay pairs of tape strips that meet at a point on that line, each pair forming a V, and space the pairs evenly from one end of the stone to the other. Trim the overlap where two strips meet so the point is sharp.
Paint the bands between the tape in alternating colors, peel, and you have colored chevrons separated by white ones. For a version with no white, paint the first set of bands, let them dry fully, re-tape over them and paint the stripes that were covered.

Three designs compared
| Design | Tape layout | Difficulty | Best stone |
|---|---|---|---|
| Color blocks | Four to six strips at random angles | Easiest | Any smooth stone |
| Triangle mosaic | Parallel strips crossed by diagonals | Moderate, more sections to fill | Larger, flatter stone |
| Chevrons | Evenly spaced V-shaped pairs | Moderate, needs measuring | Long oval stone |
Working without tape
On a rough or strongly curved stone, tape will not seal and paint will seep under it. In that case, draw the design in pencil with a ruler, fill the shapes freehand, and go over the boundaries afterward with a white or black acrylic paint pen. The lines will be less mechanical, but an outline hides most unevenness. Brush and pen techniques for this are in how to outline painted rocks.
Troubleshooting
- Tape pulled off the base coat. The base was not dry enough or the tape was too sticky. Repaint the patch with white, wait longer and take more stick off the tape next time.
- Color bled under the tape. The edges were not pressed down, or the paint was too wet. Use the white sealing coat and thinner layers.
- Edges tore when peeling. The paint had hardened into a skin bridging the tape. Score lightly along the tape edge with a toothpick before pulling.
- Colors look patchy. Add another thin coat before removing the tape. Building opacity is explained in layering paint on rocks.
Finishing
Once everything is dry, a clear brush-on or spray sealer can help protect the crisp edges from scuffs. Follow the manufacturer’s instructions on the label, including whether the product is compatible with paint pens, and see how to dry and seal painted rocks. For softer repeating motifs to combine with these, try simple patterns for painted rocks.
Frequently asked questions
How do I stop paint from bleeding under the tape?
Press the tape edges down firmly with a fingernail, then brush a thin coat of the base color along each edge and let it dry before adding colors. Use thin coats of color and stroke away from the tape edge.
When should I remove the masking tape?
Peel it when the last coat is dry to the touch but has not fully hardened. Pull slowly at a low angle, folding the tape back on itself, and score along the edge with a toothpick first if the paint has formed a skin.
Can I paint geometric designs without tape?
Yes. Draw the shapes in pencil with a ruler, fill them freehand and go over the boundaries with a fine acrylic paint pen. This works better than tape on rough or strongly curved stones.