Layering Paint on Rocks: Base Coats, Shapes and Details
Build a painted rock design in four layers, from white base coat to final highlights, and learn why bright colors need a white underlayer on dark stones.
Tutorial at a glance
Materials
- Acrylic craft paint: white, one background color, two or three shape colors
- Flat brush, about 1/2 in (12 mm)
- Round brush, size 4 to 6
- Liner brush
- Dotting tool or brush handle
- Soft pencil
- Jar of water, cloth and palette
Most painted rocks that look flat or muddy have the same problem: everything was painted at once, in whatever order came to mind. Layering fixes that. You work from the back of the design to the front, from the largest areas to the smallest, and you let each layer dry before the next one touches it.
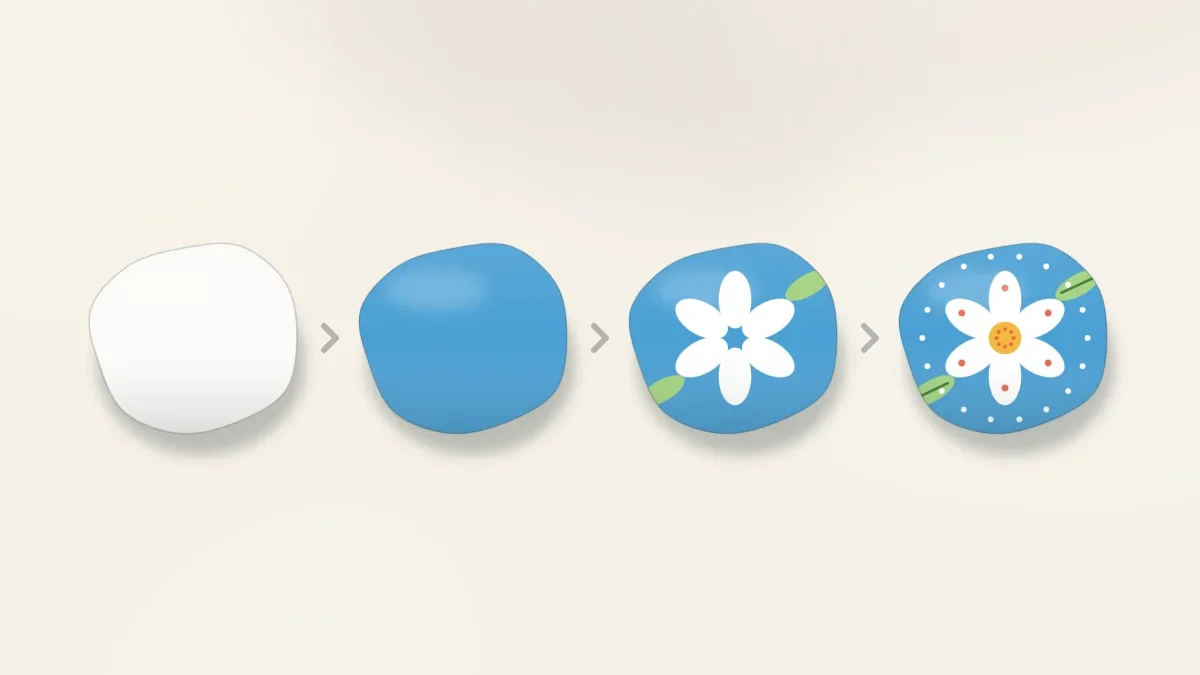
The order used here is base coat, background, main shapes, then highlights and details. It works for almost any design, from a single flower to a full landscape, and it is forgiving because every layer can cover small mistakes in the one below.
Why the order of layers matters
Acrylic craft paint dries to a thin film. Once that film is dry, new paint sits on top of it instead of mixing with it. That is what makes layering possible, and it is also why patience matters: if the lower layer is still wet, the brush drags it up and the two colors blend into a dull in-between shade.
Working back to front also saves effort. Painting a blue background around a finished flower means steering a brush around every petal. Painting the background first and the flower on top means each shape gets one clean edge, made by the stroke that draws it.
| Layer | What it does | Best tool | Paint consistency |
|---|---|---|---|
| 1. Base coat | Evens out the stone color and gives later colors something bright to sit on | Flat brush, about 1/2 in (12 mm) | Straight from the pot, spread thin |
| 2. Background | Sets the mood and covers the whole painted face | Flat brush | Creamy, two thin coats |
| 3. Main shapes | Blocks in the subject as solid, simple forms | Round brush, size 4 to 6 | Creamy, loaded on the brush tip |
| 4. Highlights and details | Adds dots, lines and light spots that bring the shapes forward | Liner brush, dotting tool or paint pen | Slightly thinned for lines, thick for dots |
What you need
- One smooth stone, 3 to 4 in (8 to 10 cm) across, washed and fully dry
- Acrylic craft paint: white, one background color such as blue, two or three colors for the shapes
- A flat brush, a round brush and a liner brush
- A dotting tool or the handle end of a brush
- A jar of water, a cloth or paper towel, and a palette or old plate
If the stone still has dust or grit on it, the base coat will lift later and take every layer with it, so it is worth reading how to clean and prepare rocks before starting. For help picking the right brush for each stage, see the guide to brushes for rock painting.
Layering a design step by step
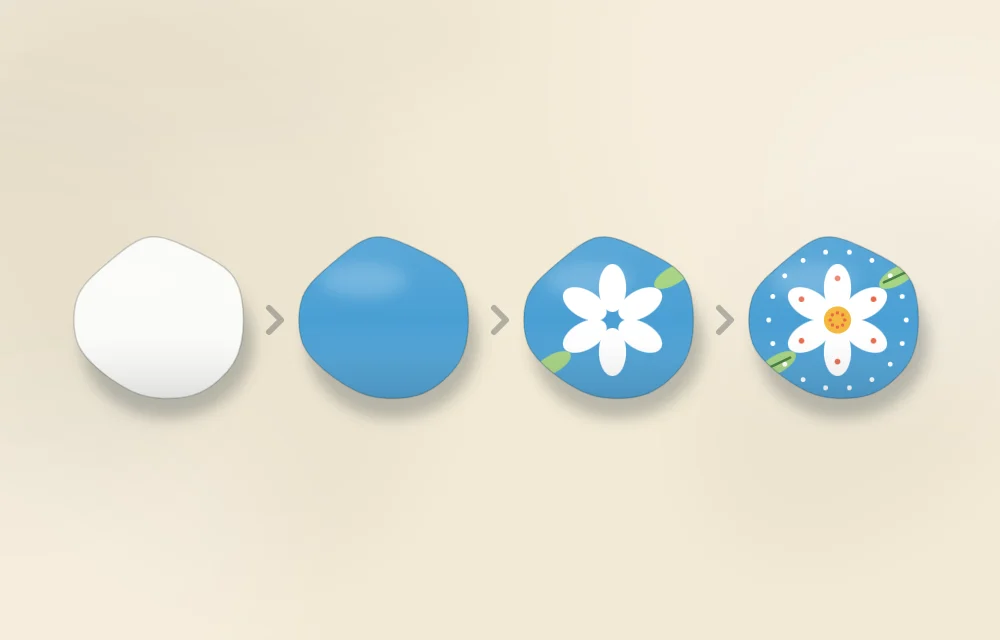
The example is a simple one: a blue background with three large leaf or petal shapes and a scattering of light dots. Swap in any subject you like; the order of layers stays the same.
- Paint the white base coat. Load the flat brush lightly and cover the top face of the stone with long strokes in one direction. A thin coat that looks slightly streaky is fine. Let it dry, then add a second thin coat with strokes going across the first. Two thin coats dry flatter and grip better than one thick coat, which tends to stay soft underneath and show ridges.
- Brush on the background color. When the white is dry to the touch, cover it with the background color using the same flat brush, rinsed and blotted. Carry the color a little way down the sides so no white rim shows when the stone sits on a table. Expect to need a second coat; judge by looking at the stone from a low angle, where thin patches show up as lighter streaks.
- Sketch the main shapes lightly. Once the background is dry, mark where the big shapes go with a soft pencil or a very pale wash of paint. Keep the marks faint and stay just inside the edge of each shape, so the next layer covers them completely.
- Block in the main shapes. Switch to the round brush. Fill each shape with solid color, starting in the middle and pushing paint out toward the edge, then finish the edge with a single slow stroke. Do not add shading or lines yet. If the color looks thin over a dark background, let it dry and add a second coat rather than piling on more wet paint.
- Add mid-tone accents. With the shapes dry, add one slightly darker or lighter tone inside them, such as a darker stripe down the center of a leaf or a lighter patch on one side of a petal. Use less paint than feels natural. These accents should cover about a third of each shape and leave the first color showing.
- Finish with highlights and details. Use the liner brush for thin lines and the dotting tool for dots. White or a very pale tint of the shape color works well for highlights. Place them where light would land, usually toward the top of each shape, and keep them small. This is the last layer, so rest the heel of your hand on the table and move the stone, not your wrist, to reach each spot.
Tip
To check whether a layer is ready, touch a spot on the side of the stone, not the design. If it feels cool or tacky, wait longer. Drying times vary with the paint, the thickness of the coat and the room, so use the label on your paint as the guide.
Bright colors on dark stones
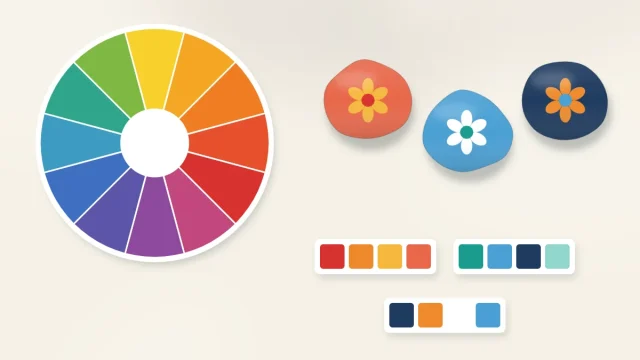
Yellow, orange, pink and light green are naturally see-through in many craft paints. Painted straight onto a dark stone or a navy background, they dry dull and greenish no matter how many coats go on. The fix is an underlayer: paint the shape in white first, let it dry, then paint the bright color over the white.
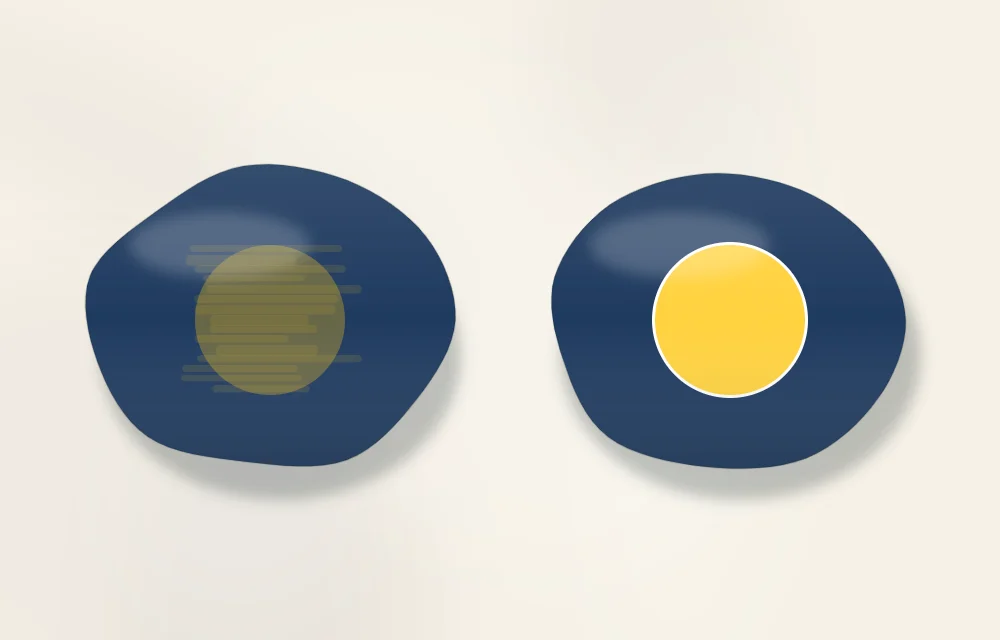
Keep the white patch a hair smaller than the finished shape. That way the color layer overlaps its edge and no white halo shows around the outside.
When a layer goes wrong
- The new color smears into the one below. The lower layer was not dry. Stop, let everything dry completely, then repaint the damaged area in the lower color and try again.
- Brush ridges show through. The paint went on too thick. Thin coats level themselves; thick ones hold the shape of the bristles. On the next stone, load less paint and add an extra coat.
- A shape came out the wrong size. Let it dry, paint over the unwanted part with the background color, and redraw the edge. This is the real advantage of layering: the background is always available as an eraser.
- Details look shaky. Thin the paint with a drop of water so it flows off the liner brush, or switch to an acrylic paint pen for the last layer.
More fixes for patchy color and bleeding lines are collected in the list of common rock painting mistakes.
After the last layer
A layered design often looks finished at this point, but a dark outline around the main shapes can sharpen it further. The guide to outlining painted rocks covers how to add one without wobbles. When every layer is dry all the way through, a clear sealer helps protect the surface from scuffs; the steps are in how to dry and seal painted rocks.
Frequently asked questions
Do I always need a white base coat on a rock?
Not always, but it helps on dark or mottled stones because it gives later colors an even, bright surface. On a pale, smooth stone you can sometimes start with the background color. A white base matters most under yellow, orange, pink and other see-through colors.
How long should I wait between layers of paint?
Wait until the layer is dry to the touch and no longer feels cool or tacky. The time depends on the paint, how thickly it was applied and the room, so check the label on your paint. Thin coats dry sooner and more evenly than thick ones.
Why does my yellow paint look dull on a dark rock?
Many light colors are partly see-through, so the dark surface shows through them. Paint the shape in white first, let it dry, then paint the yellow on top. Keep the white patch slightly smaller than the final shape so no white edge shows.