How to Paint Leaves on Rocks
Paint a leaf in three layers, outline, fill and veins, then adapt the same strokes for ferns, vines and scattered leaf patterns.
Tutorial at a glance
Materials
- Acrylic craft paint: light green, mid green, dark green, white
- Background color such as cream or pale gray
- Flat brush for the background
- Round brush, size 2 or 4
- Thin liner brush
- Pencil
- Jar of water and paper towel
- Clear sealer, brush-on or spray (optional)
Leaves are forgiving subjects. No two real leaves match, so a slightly lopsided one still reads as a leaf, and the whole design can be done with two or three greens and a thin brush.
Start with one large leaf that fills the stone. Once the outline, fill and veins feel comfortable, the same three layers scale down into ferns, vines and scattered leaf patterns.
Supplies and setup
- A smooth oval stone about 3 in (8 cm) long. An oval already has the proportions of a leaf, which makes the outline easier to place.
- Acrylic craft paint in a light green, a mid green, a dark green, white and a background color. Cream, pale gray and soft yellow all set off green well.
- A flat brush for the background, a round brush in size 2 or 4 for filling, and a thin liner brush for outlines and veins.
- A pencil, a jar of water and a paper towel.
If you only have one green, you can still make three. Mix a little white or yellow into it for the light tone, and a tiny amount of dark blue or black for the dark tone. Add the dark color a speck at a time, because it overpowers green quickly.
How to paint a single leaf
- Paint the background. Cover the top and sides of the clean stone with your background color using the flat brush. Apply two thin coats and let each dry. Green painted straight onto gray stone tends to look dull.
- Pencil a center line. Draw one faint, gently curved line along the length of the stone, stopping about 1/4 in (6 mm) from each end. This is the spine of the leaf and it keeps both halves in proportion.
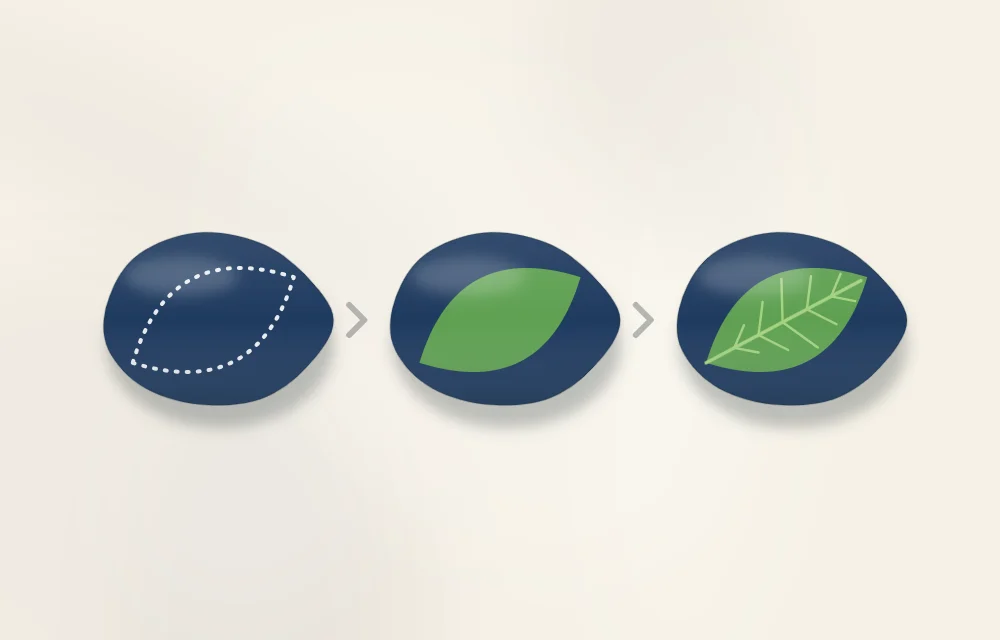
- Paint the outline. Load the liner brush with mid green thinned with a drop of water so it flows. Starting at the stem end, pull one curved line out and around to the tip, then return to the stem and do the same on the other side. The widest point should sit a little closer to the stem than to the tip. Turn the stone so you always pull the brush toward yourself.
- Fill the shape with green. Switch to the round brush and fill inside the outline with mid green, stroking from the center line outward toward the edge at a slight angle, the way real veins run. Those faint brush marks add texture for free. Let it dry and add a second coat if the background shows through.
- Add the center vein. When the fill is completely dry, paint the center vein from stem to tip with the liner brush and dark green. Press a little harder at the stem end and ease off toward the tip, so the line tapers. Extend it slightly past the base to make a short stem.
- Add the side veins. Paint four to six thin lines on each side, starting at the center vein and curving up toward the tip. Stop each one just before the edge. Stagger them slightly instead of pairing them exactly, and shorten them as you near the tip.
- Tidy the edge. If the outline was lost under the fill, go around it once more with dark green. Use the background color on a clean brush to trim any wobbles.
Tip
Liner brushes work best with paint about as thin as light cream. Load the bristles fully, then roll the tip to a point on the palette before each line. If a line breaks halfway, the brush ran dry, not your hand.
A two-tone leaf
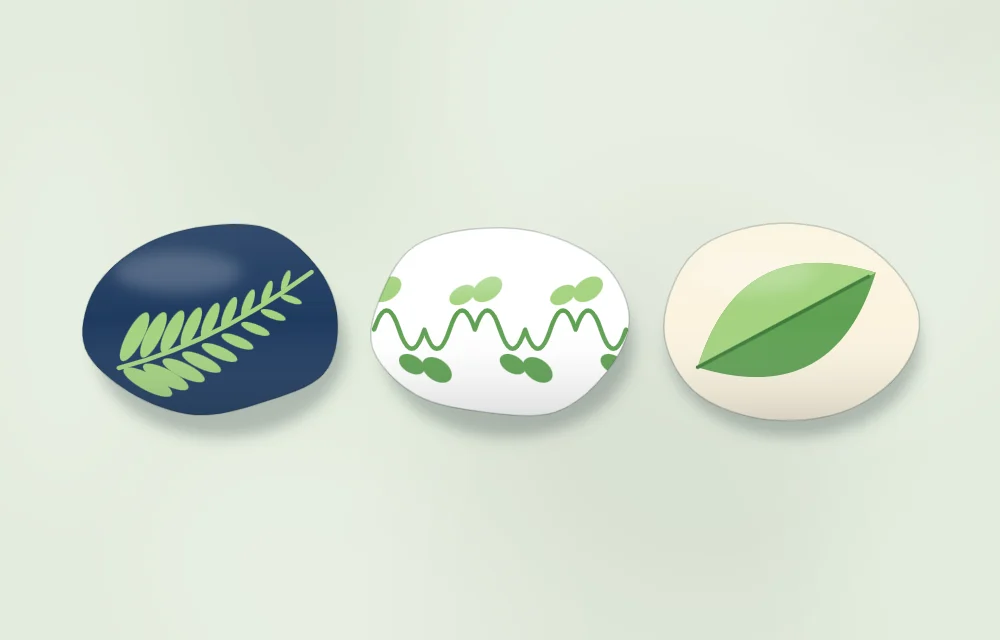
For a leaf with more depth, fill one half with mid green and the other half with light green, meeting at the pencil center line. Let both dry, then paint the center vein over the seam in dark green. The vein hides any uneven join. Side veins on the light half can be mid green and on the darker half light green, which keeps them visible on both sides.
Three more leaf designs
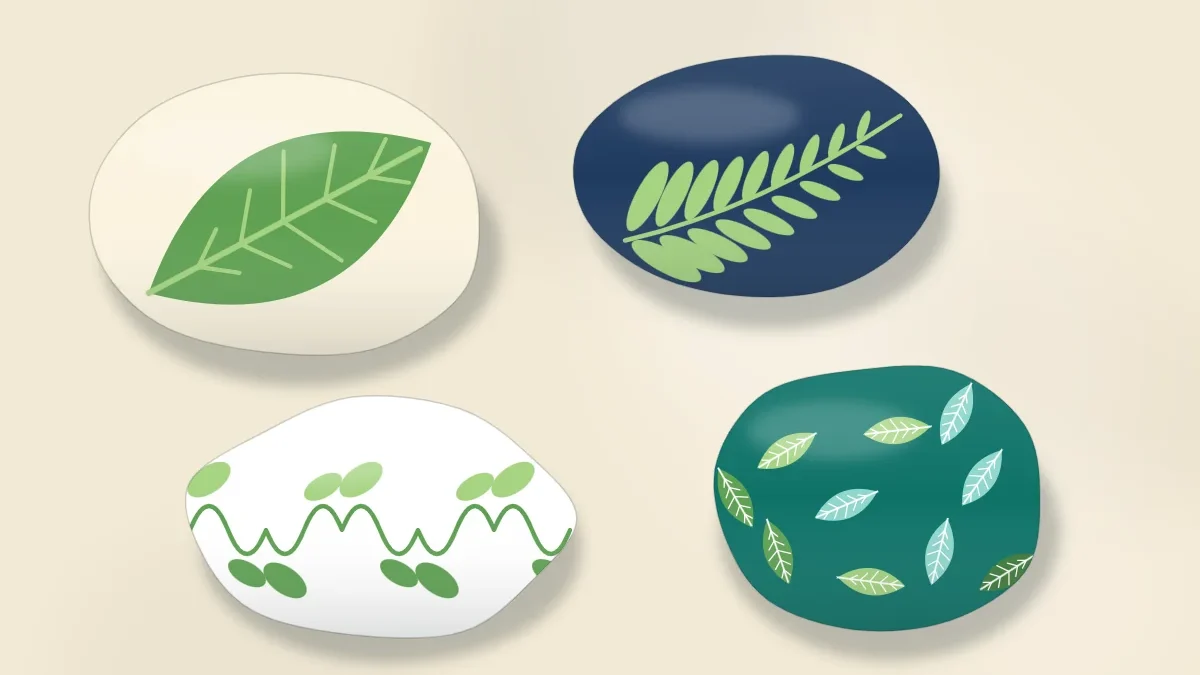
Fern frond
Paint one curved stem along the length of the stone with the liner brush. Then add pairs of short teardrop strokes on both sides: touch the tip of a small round brush to the stem, press, pull outward and lift. Make the strokes longest near the base and shorter toward the tip, so the frond tapers to a point.
Curving vine
Draw a loose S-shaped line across the stone. Add small leaves on alternating sides, each one a single press-and-lift stroke angled in the direction the vine is growing. Leave the last inch (2.5 cm) of the vine with only one or two tiny leaves so it looks like new growth.
Scattered leaf pattern
Cover the stone with small single-stroke leaves pointing in different directions, using all three greens. Paint all the mid-green leaves first, then fit the light and dark ones into the gaps. Let some leaves run off the edge of the stone so the pattern looks continuous. A thin center vein on each leaf is enough detail at this size.
Which brush for which part
| Part of the leaf | Brush | Paint consistency |
|---|---|---|
| Background | Flat brush | Straight from the pot, in thin coats |
| Outline | Liner brush | Thinned with a drop of water |
| Fill | Round brush, size 2 or 4 | Straight from the pot |
| Veins and stem | Liner brush | Thinned with a drop of water |
| Small single-stroke leaves | Small round brush | Straight from the pot |
For more on what each shape of brush does, see the guide to the best brushes for rock painting.
When something goes wrong
- Veins blur into the fill. The green underneath was still damp. Wait until the surface is dry to the touch and no longer cool before adding lines.
- The leaf looks like a blob. Give it a clear point at the tip and a stem at the base. Those two details do most of the work of saying “leaf”.
- Vein lines are thick and shaky. Use less pressure and move faster. A quick, light pull gives a steadier line than a slow, careful one. A fine acrylic paint pen is an alternative, and how to outline painted rocks compares the two.
- The greens look flat. Add a few thin light-green lines between the dark veins, or a small highlight along one edge. Choosing tones that sit well together is covered in color planning for rock painting.
Finishing
Let the paint dry fully before handling the stone much. A clear brush-on or spray sealer can help protect the surface from scuffs; follow the manufacturer’s instructions on the label for coats, drying time and ventilation, and have an adult handle spray products. Steps for both types are in how to dry and seal painted rocks.
Leaf stones pair naturally with flower stones in a bowl or on a shelf, and how to paint flowers on rocks uses the same press-and-lift stroke. Stones kept outside can fade or chip and may need touching up.
Frequently asked questions
What colors do I need to paint leaves?
Three greens are enough: a light, a mid and a dark tone. If you have only one green, mix a little white or yellow into it for the light tone and a tiny amount of dark blue or black for the dark tone.
How do I paint thin vein lines without them wobbling?
Thin the paint slightly so it flows, load a liner brush fully and roll the tip to a point. Then pull the line quickly with light pressure, turning the stone so you always pull toward yourself.
Should I paint the veins before or after filling the leaf?
Paint them after. Fill the leaf shape with green first and let it dry completely, then add the center vein and side veins on top so the lines stay crisp.