How to Paint an Owl Rock
Paint an owl on an upright oval stone in three stages: body color, cream belly and eye circles, then pupils, beak and feather marks.

Tutorial at a glance
Materials
- Acrylic craft paint: brown, cream, white, black, orange
- Flat brush, about 1/2 in (12 mm) wide
- Round brush, size 4 or 6
- Detail brush or acrylic paint pens
- Dotting tool or brush handle, and a toothpick
- Pencil and a small coin or bottle cap for tracing
- Jar of water and paper towel
- Clear sealer, brush-on or spray (optional)
An owl is mostly eyes. Get two large, even circles onto an upright stone and the rest of the bird falls into place around them: a pale belly below, a small beak between, a wing down each side. That makes the owl a friendly step up from ladybugs and bees, with a little more layering but no difficult drawing.
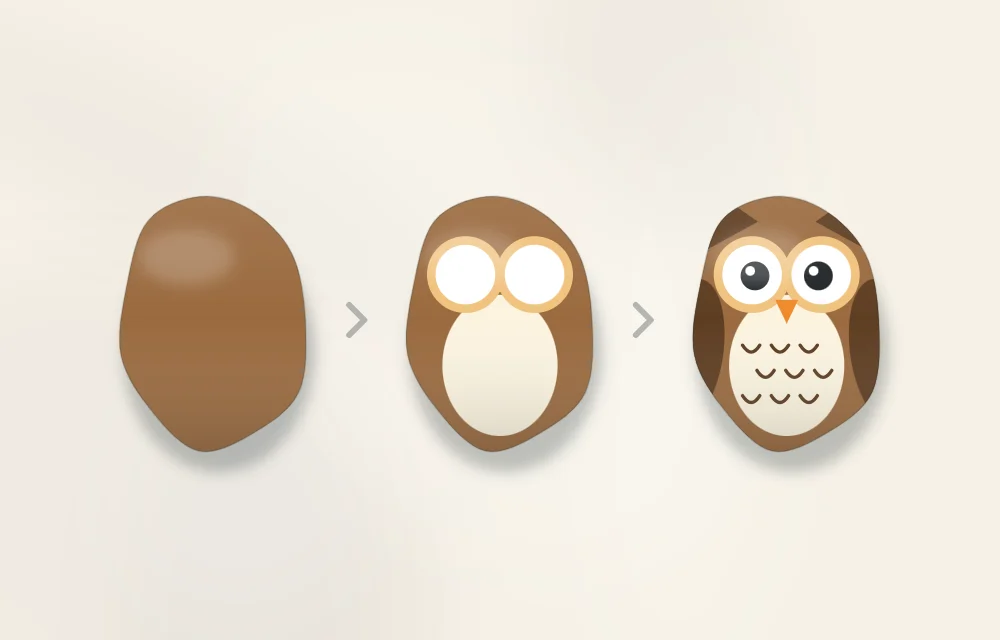
The design below is a generic, rounded owl painted in three stages: the body color, then the cream belly and eye circles, then the pupils, beak and feather marks.
The right stone for an owl
Choose a smooth, egg-shaped stone about 3 to 4 in (8 to 10 cm) tall. Stand it on its wider end and paint it upright, so the broad base becomes the body and the narrower top becomes the head. A stone with a flattish bottom will stand on its own when finished; one that will not stand can lie on its back and still look right.
A fairly flat front face makes the eyes easier to paint. Run a fingertip over the area where they will go and pick a different stone if you feel pits or a ridge there. More on reading stone shapes is in how to choose rocks for painting.
Materials
- One smooth, upright oval stone, clean and dry
- Acrylic craft paint: brown, cream (or white with a touch of yellow and brown), white, black and orange
- A flat brush about 1/2 in (12 mm) wide for the body
- A round brush, size 4 or 6, for the belly, eyes and wings
- A small detail brush or acrylic paint pens for feathers and outlines
- A dotting tool or brush handle, and a toothpick
- A pencil and, if you like, a coin or bottle cap to trace around
- A jar of water and paper towel
- Clear sealer, brush-on or spray (optional)
How to paint the owl, stage by stage
- Paint the body base color. Cover the whole front and sides of the stone with brown, using the flat brush and downward strokes from head to base. Let it dry and add a second thin coat. If the stone will stand upright, paint the back as well once the front is dry.
- Sketch the main shapes. In light pencil, draw two circles side by side in the upper third of the stone, touching or nearly touching in the middle. Tracing a small coin keeps them the same size. Below them, draw a wide U for the belly that starts under the outer edge of one eye and ends under the other, reaching almost to the base.
- Fill the cream belly. Paint inside the U with cream using the round brush. Outline the curve first, then fill toward the middle. Light colors over brown usually need two coats, so let the first dry before judging the coverage.
- Paint the eye circles. Fill both circles with white. Work around the edge of each circle with the tip of the brush, turning the stone as you go, then fill the center. Apply a second coat when the first is dry so no brown shows through. This completes the second stage: a brown stone with a cream belly and two blank white eyes.
- Add the pupils. When the white is fully dry, press a large black dot into each eye with the handle end of a brush or a large dotting tool. Place both pupils in the same position, either centered or both slightly toward the beak. After they dry, add a small white dot in the upper corner of each pupil with a toothpick, on the same side in both eyes.
- Paint the beak. Between and just below the eyes, paint a small orange triangle pointing down. Two short strokes that meet at the tip are enough. If the orange looks dull over the brown, paint the triangle white first, let it dry, and go over it with orange.
- Draw the belly feathers. Using a detail brush or paint pen in brown, add rows of small V or U marks across the cream belly. Stagger each row so the marks sit between those in the row above. Three or four rows are plenty.
- Add the wings. On each side of the belly, paint a long teardrop in a darker brown, with the rounded end near the eye and the point aimed toward the base. Mix a little black into the body brown to get the darker shade. When dry, add two or three curved lines inside each wing for feathers.
- Finish with small details. Outline the eye circles with a thin dark line to sharpen them. Add two small pointed ear tufts at the top of the head and three short orange lines at the base on each side for feet, if there is room. Let the stone dry completely before sealing.
Tip
Paint both eyes at each stage before moving on: both white circles, then both pupils, then both highlights. Finishing one eye completely before starting the other makes it much harder to match them.
Changing the expression
Small shifts in the eyes change the character of the whole owl. Try these on paper first, then pick one for the stone.
| Look | How to paint it |
|---|---|
| Wide awake | Large pupils centered in the eye circles, one highlight dot in each. |
| Curious | Both pupils shifted to the same side, as if looking at something. |
| Sleepy | Cover the top half of each eye circle with body color to make a lid, with a half pupil below. |
| Asleep | Skip the pupils; draw one downward curve with short lashes across each white circle. |
| Stern | Add a short slanted brow line above each eye, angled down toward the beak. |
When something goes wrong
- Eyes are different sizes. Enlarge the smaller one to match. It is easier to grow a circle than to shrink one.
- Eye circles have rough edges. Let them dry and tidy the outside with body color on a small brush, or cover the edge with a thin outline. The guide on how to outline painted rocks shows how to keep that line steady.
- Cream or white looks see-through. Add another thin coat instead of loading on thick paint, which may crack as it dries. Layering paint on rocks explains why light colors need an extra pass over dark ones.
- A pupil smeared. Wait until it dries, repaint the eye circle white, and add the pupil again.
Color ideas for a family of owls
Brown and cream is the classic pairing, but the same steps work in any palette. A gray body with a white belly gives a snowy look, teal with a pale yellow belly is playful, and a berry body with a pink belly suits a gift. Keep the belly clearly lighter than the body so the feather marks show up. For help picking colors that sit well together, see color planning for rock painting.
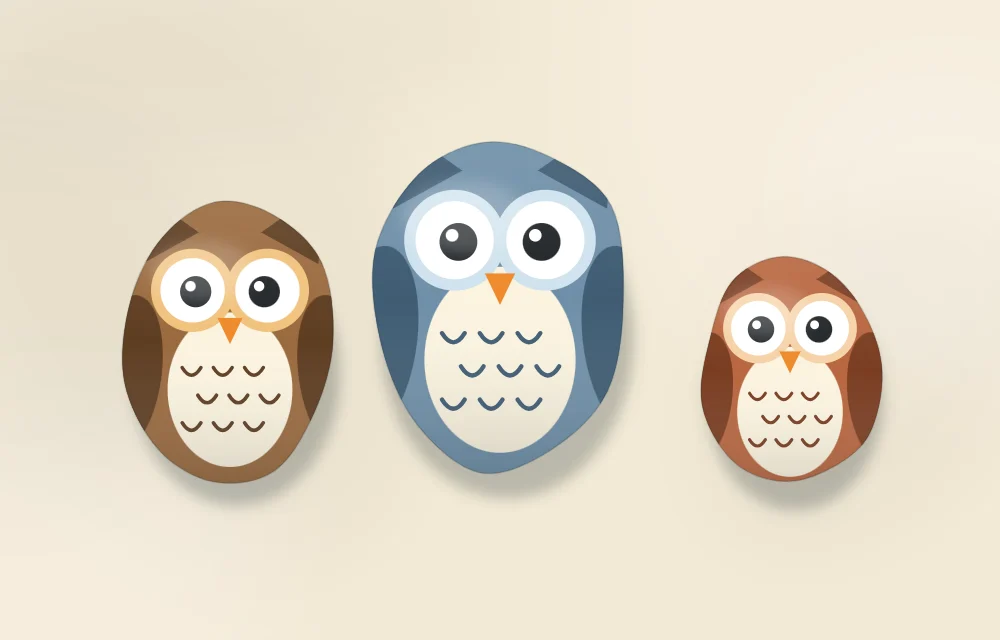
Paint three stones of different heights for a family and stand them in a row on a shelf, or rest one in a plant pot among the leaves. A few strawberry rocks painted in the same sitting make a bright companion for the pot.
Sealing and care
Once the paint is dry, a clear sealer helps protect the surface from scuffs. If you used paint pens for the feathers, check that the sealer is compatible with them, and follow the manufacturer’s instructions for coats, drying times and ventilation. Adults should handle spray products. Painted rocks displayed outdoors can fade, chip or wear and may need touching up. An owl stone is a decoration, not a toy, so keep it out of reach of small children.
Frequently asked questions
How do I make both owl eyes the same size?
Trace around a small coin or bottle cap with a pencil for each eye before painting. Then work on both eyes at each stage, painting both white circles, then both pupils, so they stay matched.
What shape of rock is best for an owl?
A smooth, egg-shaped stone stood on its wider end works well, with the narrow end as the head. A flattish front face makes the eyes easier to paint, and a flat bottom lets the owl stand upright.
Why does the cream belly look patchy over the brown?
Light colors are less opaque than dark ones, so brown shows through a single coat. Let the first coat dry and add a second thin coat, or paint the belly area white first and then cream on top.